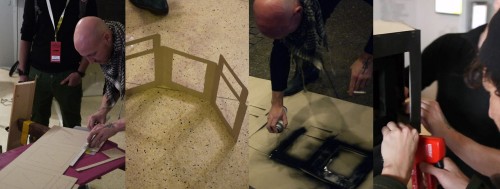
I performed the piece “Are you human?” at the Graphic Design Festival Breda two weeks ago. Thx to Rick for the video documentation!
Aram Bartholl 2010
Very enlightening 3 minutes excerpt of a 60 min talk by Eben Moglen on Zuckerberg, Facebook, spying and business models. Great glassses Eben!!!
Video of the full talk here. (above excerpt starts at 24:40)
Eben Moglen on “Freedom in the Cloud: Software Freedom, Privacy and Security for Web 2.0 and Cloud Computing†at ISOC-NY ( Greater New York Metropolitan Area chapter of the Internet Society). Eben Moglen, Professor of Law and Legal History at Columbia University, and founder, Director-Counsel and Chairman of the Software Freedom Law Center, spoke about “Freedom in the Cloud: Software Freedom, Privacy and Security for Web 2.0 and Cloud Computing†on Friday, February 5, 2010.
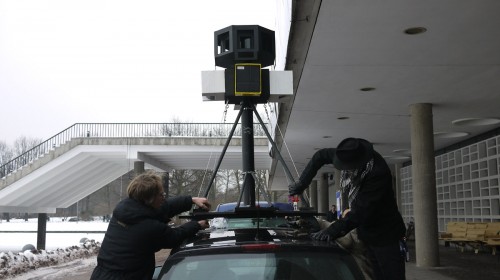
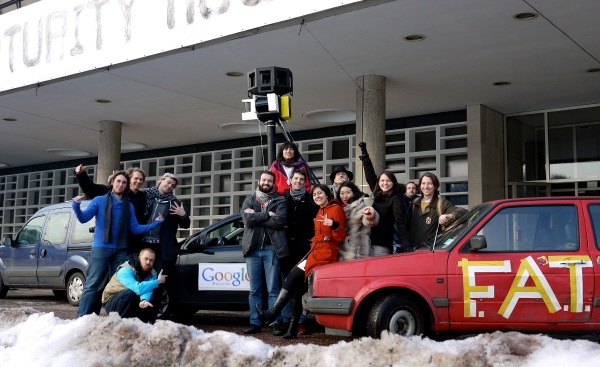
For Transmediale 2010 F.A.T. members met in Berlin and produced a series of projects dedicated to the topic of the week: FUCK GOOGLE. In addition to free software, browser addons, live streams, communiques and on-site workshops, F.A.T. Lab built a fake Google Street View car and conquered the city of Berlin! All FG projects!
Now it’s your turn! Go out there and see what it’s like to be Google!
Download the instructions in a PDF here!
Step 1:Â Find the correct car:
Do some research on Google images and pick the exact car model used by Google in your city. Contact your local car rental. If the car doesn’t come with one, rent or buy the specific roof-rack for that car.

Original Google Street View car Germany (2006 – 2008, last seen in Berlin Oct. 2009)

Fake Google Street View car by F.A.T. Lab during Transmediale Berlin 2010
Step 2: Materials:
(x1)Â PVC tubing 11 cm diam. – 140 cm (main pole)
(x2)Â wooden boards 100 x 16 x 2,5 cm (base)
(x1)Â wooden board 130 x 30 x 2,5 cm (base)
(x2)Â wooden poles 3 cm diam. – 130 cm (diagonals)
(x2)Â wooden poles 2 cm diam. – 100 cm (lower diagonals)
(x2) wooden board 55 x 55 x 1 cm (octagon)
(x2) wooden board 40 x 30 x 1 cm (center box)
(x2) wooden board 40 x 23 x 1 cm (center box)
(x2) wooden board 28 x 230 x 1 cm (center box)
(x6) big sheets of 2mm card board(x16) L-brackets
(x1) container craft glue
(x1) hot glue gun
(x1) roll of double-sided tape
(x1) 50 meter roll of white duct tape
(x1) can of black paint
(x1) paint brush
(x3) black spray paint
(x2) white spray paint
(x1) big sheet of black reflective vinyl
(x10) M8 x 50 bolts
(x10) M8 nuts
(x50) selection of wood screws
(8 m)Â steel cable
(x8) cable crimps
(x4) cable tensioners
(x8) eye hooks
(x2) Google street view signs
(x1) roof rack
Step 3: Plan overview:
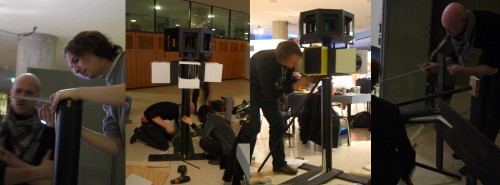
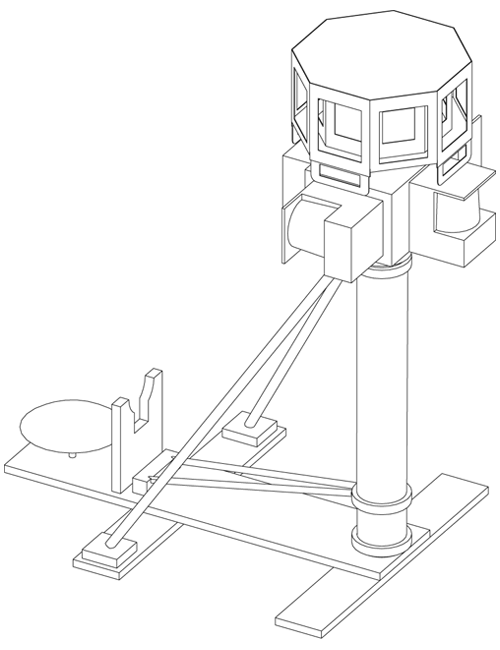
Feel free to make adjustments to the dimensions and go into more detail than we did. As you can see, our camera-top came out a little bigger than the original one. The laser scanners (white boxes) were adjusted to size but came out too big in relation to the rest.
Step 4: Center box & tube
- Mount the center box and saw a hole 11cm in diameter in the center.
- Slip it over the tube and attach it with L-brackets and screws.
- Cut 2 octagons from the 55 x 55 cm wood boards.
- Mount the base octagon on top of the tube with L-brackets.
- Paint/spray all black.
Step 5: Octagon (no cameras inside!)
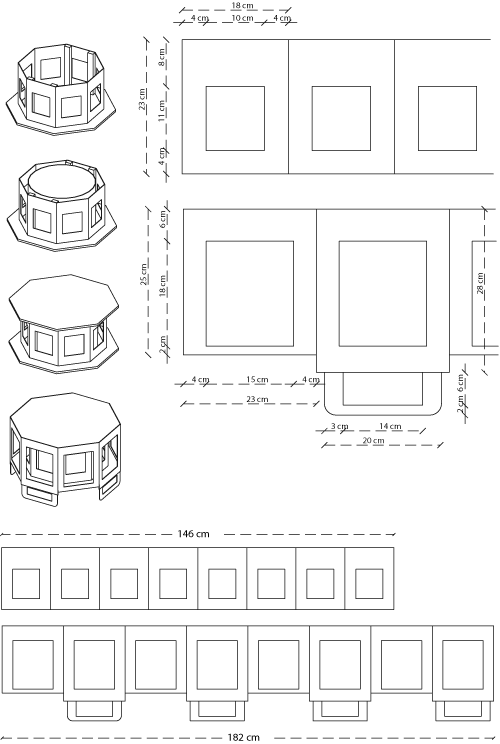
- Cut the inner and outer octagon walls from the cardboard.
- Paint both sides of the strips black.
- Glue 4 pieces of wood (23 cm) to the inner ring.
- Screw and glue the inner ring on the base.
- Hide the inside with a cylinder of black vinyl.
- Screw and glue the top octagon.
- Clamp the outer ring on.
- Mount the finished octagon on the main tube with L-brackets.
Step 6: Laser scanners & control unit
- Build the laser scanner boxes from cardboard.
- Use white tape or paint to cover them.
- Bend a piece of cardboard in the window and cover it with black vinyl.
- Mount the 3 boxes to the center box (directions!)
- Build the control unit, paint it yellow, and screw it to the rear side of the center box.
Step 7: Mount main pole on base unit
- Mount the main pole to the base with L-brackets.
- Attach rods to the ring on the tube and screw them in the base.
- Stabilize with flight cables on all 4 corners of the center box to the base.
- Add lower diagonals, dish and stand for optical enhancement.
Step 8: Mount the fake camera top onto the car:
- Screw 4 holes (8mm in diameter) in each bar of the roof rack.
- Drill the corresponding holes in the wooden base.
- Mount the camera top with nuts and bolts to the roof rack
- Make sure the roof rack is mounted and sits tight.
Drive carefully and have fun in the city!!!
The expressions published in this site are all in the public domain. You may enjoy, use, modify, snipe about and republish all F.A.T. media and technologies as you see fit.


