How did we track the crossfader during the Art Hack Day?!? ZOMG!! So many questions!
The answer is very simple! We used a VCA Mixer. Specifically the Vestax PMC-07 Pro. Because you know… we’re pro like that.
I hear you asking now, “But, sir! WTF is a VCA Mixer?!?!”
Well, I’m glad you asked. Allow me to explain: VCA or Voltage Controlled Amplifier means that instead of sending the audio signal to the crossfader the mixer instead sends a voltage which in turn controls the volume level for each channel. This makes determining the position of the fader very easy; simply measure the voltage for each channel.
Because we’re so damn pro and didn’t have any of the parts to make a proper Y cable we just soldered everything to the crossfader.
Go team awesome!

Yes, I hear you. You’re wondering, “That’s all well and good, but how am I supposed to hook it all up?!?”
Here I drew you a picture too!
The Arduino sketch we used can be found here.
In summation here is a list of items you must procure to do this:
- Vestax PMC-07 Pro mixer (Any VCA mixer will do, just drop the voltage to 5V or less.)
- Four 100 kilohm resistors
- An Arduino
- A proper Y cable for the PMC-07 Pro. Instructable for building it is here
- Arduino sketch found here
Build your Y cable. Make a couple voltage dividers. Hook it up like the picture above and BLAMO!
#Pro-Tip: Elliot Marx informed me that if you use an Innofader (the origional, not the Pro or PNP) it will limit the VCA voltages of the PMC-07 Pro to 5V eliminating the need for the voltage dividers. Wire colors for the Innofader are as follows:
Blue = 5V
Green = VCA1 (varies from 0 to 5 volts)
Yellow = VCA2 (varies from 5 to 0 volts, moves opposite from VCA1)
Grey = ground
Thank you Elliot!
We know what the white girls say, and what flute players say, and even what black guys say to pregnant girls. But what don’t you know who said what to whom? Has anyone said this shit?
A live search engine for all the shit people say. Over 700 videos at last count.
A collaboration with Lindsey Weber and Tanner Ringerud at BuzzFeed.
Speed Project: 8 hours

ScratchML, like GML, is an XML-based format for storing information about the position of the record and crossfader during a scratch performance.
This is a “beta” release of the .SML file format, with sample data for 1 turntable and 1 crossfader. The format is designed to accomodate multiple turntables and crossfaders and a wide variety of data capture techniques, but we’ve only field-tested it against the basic 1 deck + 1 mixer scratch setup, which is what we were working with this weekend.
The two most important fields are:
- <turntable> — stores data about the playback position on the record as a consistently sampled stream of floats, with <samplerate> samples per second.
- <fader> — stores data for crossfader movements, ranging from 0 (full-left) to 1 (full-right). This data is stored only when the fader actually moves, and is stored as <p> (position) and <t> (time) tuplets.
Sample data produced by LM4K, mostly baby scratches and flares: XML / JSON
Spec + commentary:
ScratchML r6 beta spec:
The ScratchML.com database can also automatically convert from XML to JSON for use in javascript visualizations. Change the .xml file extension to .json, and optionally pass a JSONp ?callback= parameter, like this.
During Art Hack Day we converted SML to OSC and broadcast it over the wifi for realtime visualizations — more info to come about that.
http://youtu.be/eE26y-r63vY, track byDanny Dive Thru
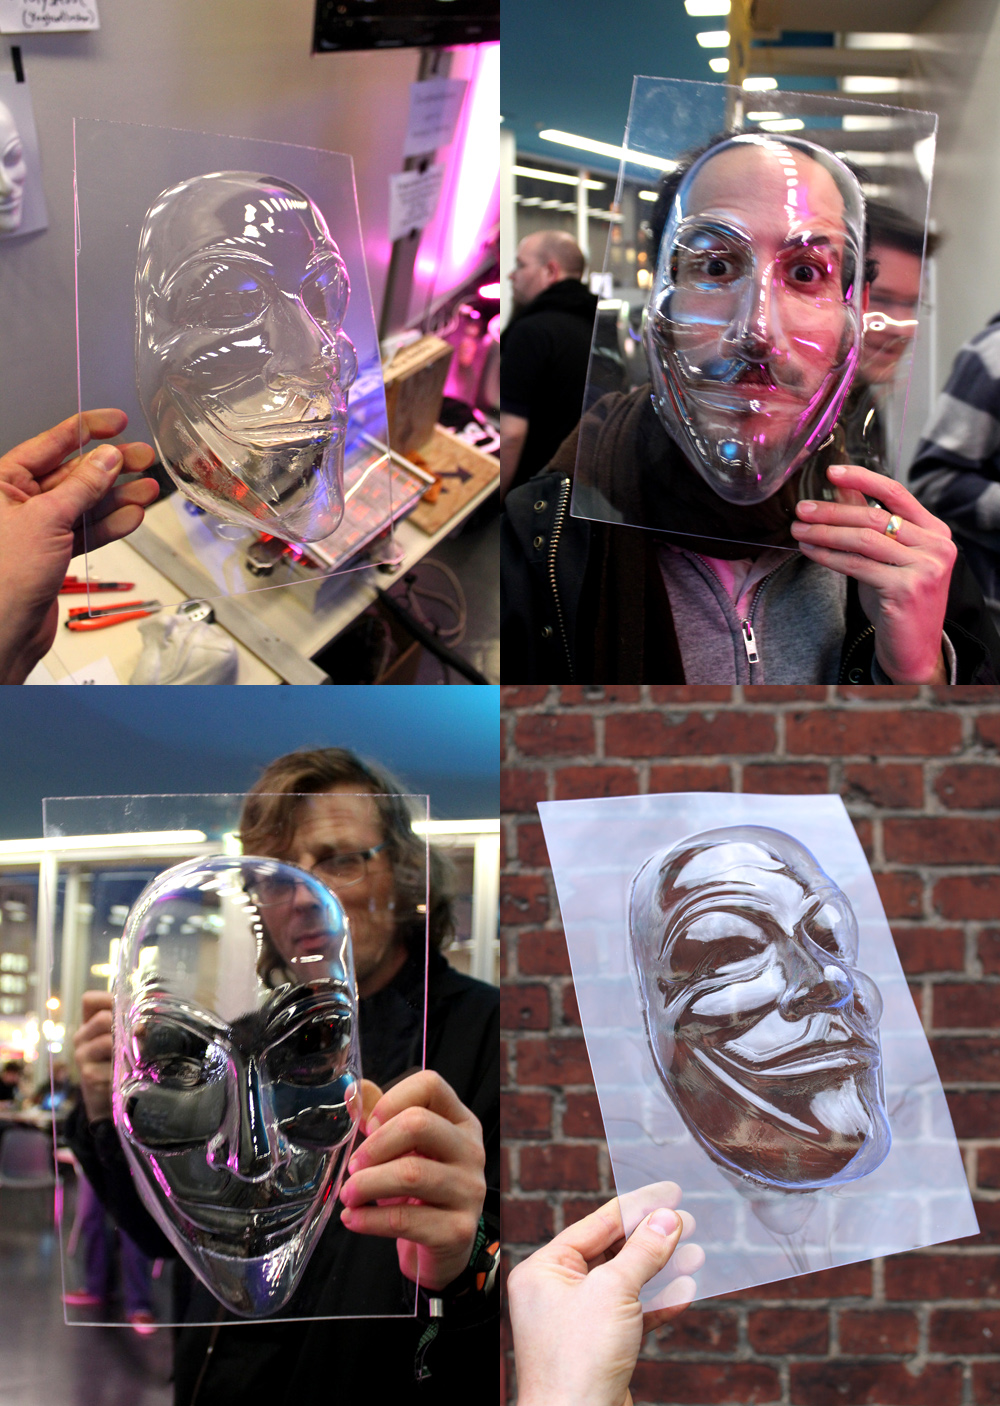
I am very pleased to finally publish this new project I’ve been working on the last couple months (def. not a Speed Project ;) It was premiered last week at my solo show opening ‘Reply All’ at [DAM] Berlin. If you are in town drop by, check out the show and make your own mask! FOR FREE!!
‘Reply All’
Solo show: Aram Bartholl, January 28 – 10th March 10 2012
[DAM] Berlin, Neue Jakobstr. 6/7, 10179 Berlin
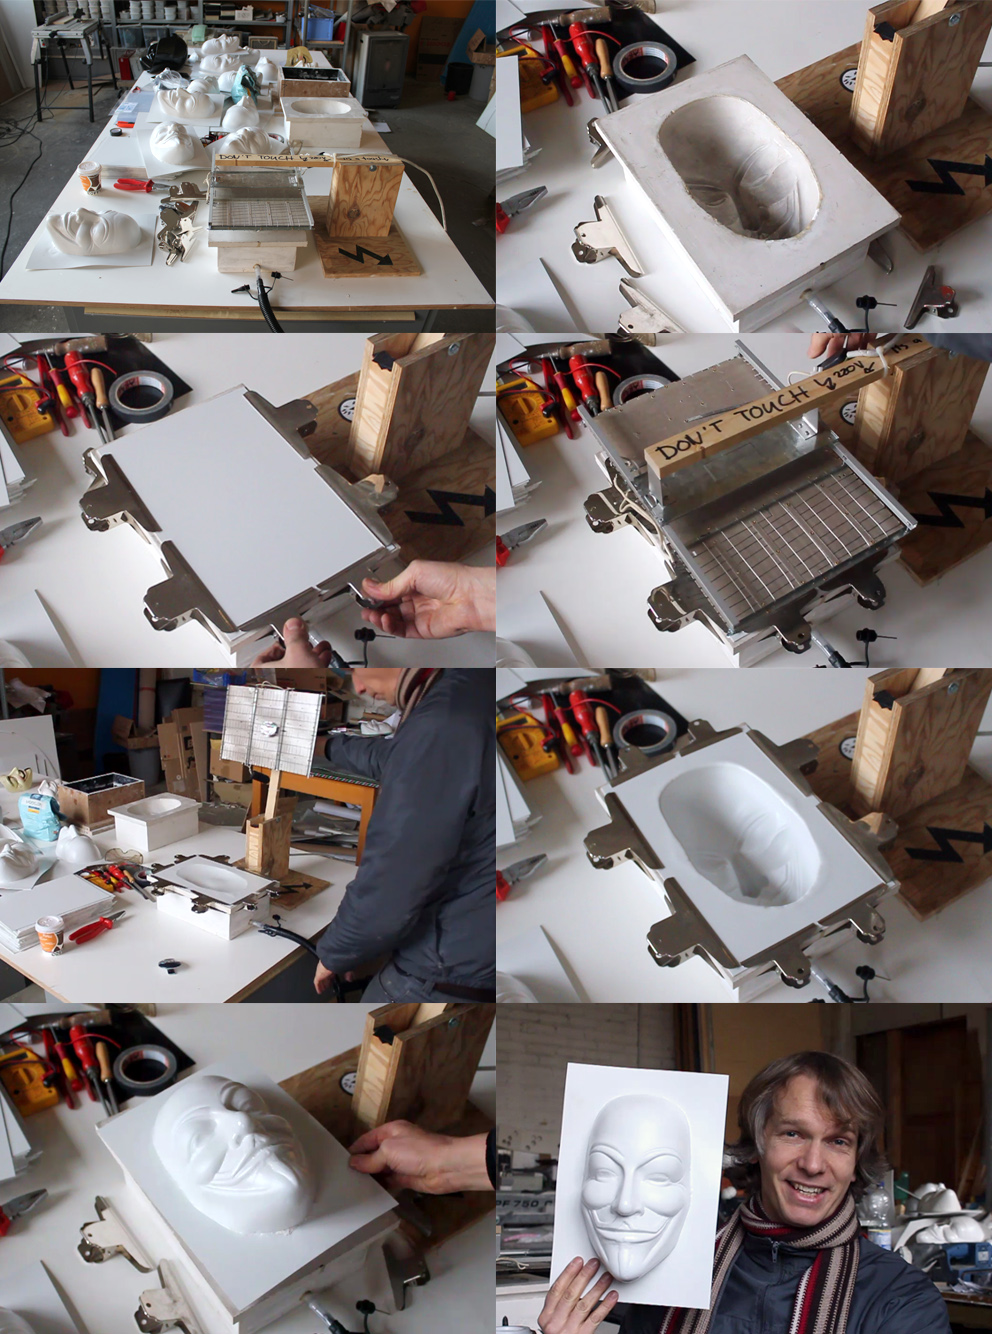
Materials:
- polysterol 1-1,5 mm, 23 x 33 cm
- plaster
- hose, hose connectors
- clamps
- vacuum hand pump, (camping supply)
- toaster
- wooden board, rods
- stop watch
- original, prototype or master mask to make copies from
Tutorial:
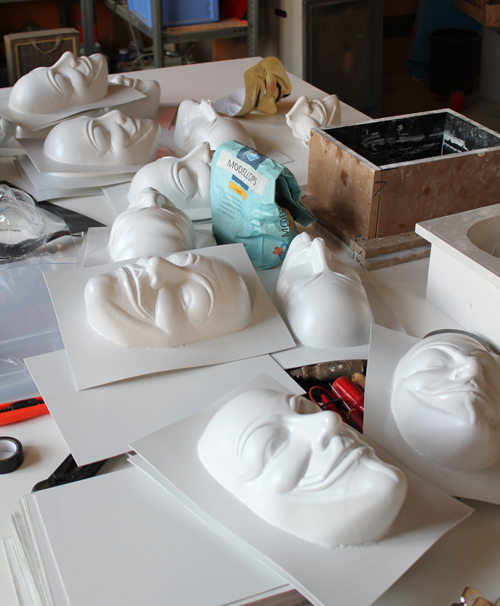
- positive plaster cast from mask
- additional plaster modeling (chin and forehead) optional
- negative plaster cast from model to obtain master mold
- include hose, hose connector and holes for decompression in the cast
- toaster parts rearranged to heating board, mounted on stand
- heat 1mm polysterol approx. 2 min in 6cm distance
- and keep pumping !!
Vacuum forming is a quite old technique and is used a lot in mass industry especially packaging and such. The lid of your coffee cup is vacuum form i.e. Students in product design are used to vacuum form their prototypes, it’s a very common technique in that field. You also find all kinds of tutorials on the web how to build your own DIY vacuum former (Instructables). The one I am proposing is less flexible in what you can produce but are able to produce the same piece in a rather fast cycle (2:30 min) The setup above was inspired by this video.
I think we live in a super interesting era. This is just the start of a paradigm shift from mass industry production to self DIY fabrication. And it s going to get very interesting with all the patents and copyright issues for physical objects very soon. Like Cory Doctorow puts it: “… to fight what we thought was the final boss at the end of the game, but it turns out it’s just been the mini-boss at the end of the level, and the stakes are only going to get higher.” I am super curious to see someone print a pair of Nike sneakers on the new makerbot replicator or just imagine Apple would sue everyone because your DIY tablet looks like an iPad. It might happen soon. – Aram Bartholl 2012
Build your own vacuum forming gear today. Copy, experiment and remix! Start coping physical things! And keep pumping!! ;)
“You don’t know the power of the dark side! We are Legion. The force is with you. Expect us. Join the dark side !”
“How To Vacuum Form”
by Aram Bartholl 2012
The expressions published in this site are all in the public domain. You may enjoy, use, modify, snipe about and republish all F.A.T. media and technologies as you see fit.


